Zine

Each student will write, design and print a sixteen page magazine.This is the final project for the class, and is the most difficult and challenging project we'll attempt this semester. It is worth 20% of your final grade for the course.
Requirements
Format
Sixteen pages, 5.5x8.5". (this is made by stacking and folding four pieces of US letter paper). Students may want to create a different shape for their zine, and may do so, as long as the finished zine is at least 16 pages long, and no larger than half-letter.
Black, white and gray only, no color printing. You may hand color some areas, and you may use colored paper, though.
Any combination of digital and analog media is allowed. Although most students design the whole thing in InDesign, this is not the only way to work.
Content
Your Zine may have text, images, or both--any combination.
Your Zine may be very linear and contain a story or essay. It could just as easily be very "abstract", and have very little verbal structure.
Any subject is allowed. Any topic, any image, any language. Be prepared to discuss your motivations and vision for the zine.
Only original content-no cut and paste from the web, no photos or illustrations from the web. Exceptions: see "collaboration" below.
Collaboration You may use another person's work, but only if you get written permission to use their words or images. Also, you must make it clear in your zine who did what. Credit all images and text to the original creator. There may be a faculty member or student who would like you to lay out her poetry into a little booklet, or maybe someone in your church has written a guide for new members. This is a fine idea for a project, but remember if you start working with someone else, you will probably have to listen to their opinions about the design.
Dual Credit You may wish to combine this project with a project from another class. If you have to write a term paper for Comp II, you could design it in here as well! I (almost) guarantee that the prof will be excited to see your essay on John Locke presented in a slick little book. Discuss this option with both your design professor and the other professor first-one or both of them may have some useful suggestions.
Printing
Proofread Carefully!! Errors in punctuation, spelling, grammar, etc., will be detrimental to your grade, even if someone else supplied the copy. Proofread many times. I am a very good, and very thorough proofreader, and will catch any mistakes you miss.
Printed on a laser printer or copier.
You are responsible for all printing/binding costs. Binding can range from staples, to sewing, to hardback binding.
You must make sufficient copies for all students to receive one copy, plus two more.
Part One: Inspiration and Brainstorming
A great online source of magazines.
Gather 5-10 examples of styles that you would like to use as guides or inspiration for your project. These examples should be as different from each other as possible. If one of your examples is People magazine, don't bring US Weekly, as they look a lot alike. Keep in mind that you will not be able to use color, so if your inspiration is dependent on color, you'll need to modify the design substantially.
Brainstorm in class or on your own. Once you get a variety of ideas, pick the best three, and fill out the form. We will discuss your ideas in class.
You will get homework/lesson credit for completing and submitting your Zine Idea Form, and for presenting your 5-10 examples in class.
Part two: Planning the Content
At this point, all your ideas have been discussed and the various merits of each idea and inspiration source have been debated. Now it's time to narrow your ideas to a single choice and develop it into something you can create.
First, take the idea that you have developed, and rewrite it (if necessary) and paste it into the top portion of the zine plan form. Once you have the basic idea laid out, divide it into sections, including table of contents, etc. Any kind of planning you can do at this stage will help you immensely in producing the finished product. You will probably not know exactly what goes on each page, but you should have the major areas filled in.
You must include an Artist's Statement in the book, explaining what you made and why. Make sure to leave room for it as you develope what goes where.
You will get homework/lesson credit for completing and submitting your Zine Plan Form.
Part Three: Making your booklet
Rather than just starting out by sticking stuff into InDesign and hoping for the best, we'll do some planning on paper. If you're making an all-analog zine, this is even more important.
Get four pieces of blank letter-size paper, and fold them in half. Then staple the center, so you have a booklet. This is the size and shape of your zine. You may cut some of the paper off if you want a smaller booklet, but you can't go any bigger. Additionally, you could switch to Japanese binding, or some other arrangement of space, but you'll have to change your page size and printing will be a little more difficult. Unless you're feeling ambitious, stick to the booklet form-it's the simplest.
Start drawing out some ideas for how the pages will look-draw right in your little stapled blank booklet. You don't need to draw all the details, but you should definitely rough out the basic compositions you think you would like to use-this is where your guide/inspiration magazine becomes invaluable, as you will get lots of ideas for laying out text and images, borders, styles, etc. Go back to your form, or open the pages that you marked to get ideas.
You will note that the only spreads that cannot be "broken" are the centerfold and the front cover/back cover. Any of the other spreads have the potential to not align perfectly if the printing is off a little bit. Pay attention to this when laying out your zine-splitting a picture of a person over the gutter might lead to something like this:
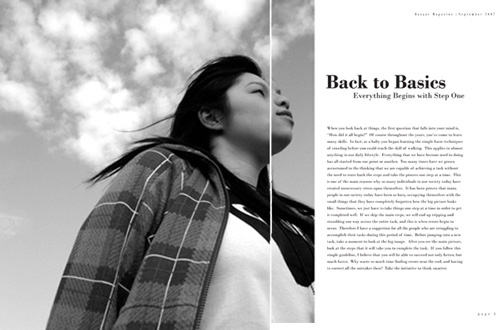
There are lots of ways to avoid this, but it's easy to overlook this potential problem when laying things out.
We will look at the drawn booklets, your forms, and your source magazines in class.
You will get homework/lesson credit for completing and submitting your booklet, with compositions drawn in pencil.
Part Four: Gather Content
Get all stuff you need to make the zine. Here are some of the elements you will have to design, draw, photograph, write, or otherwise acquire:
copy-all the text that you want to go into the zine.
photos-remember, no stealing from the web.
logos-back to illustrator?
artwork-drawing, photoshop, other?
Put all this stuff in a folder, once it's digitized. Show me the folder.
You will get homework/lesson credit for gathering and presenting your content.
Part Five: First Draft
At this point you should be looking pretty carefully at fonts, styles, ornaments, and general layout of the zine. Look at the form again, and fill out the "Inspiration" section. Get some post-it notes and mark pages that you like the best.
Start putting things into InDesign (or pasting up by hand, if you're going "old school"). As you have all the pieces and you have your layout roughed out, and know where every thing goes, this should be a snap, right?
Probably not. There are a lot of little tricks that will make this project easier, especially if you have a "traditional" layout, consisting of pages with page numbers, headers, a variety of paragraph and character styles, etc.
Here are some page elements you should set up:
page size and number (half-letter, vertical, 16)
margins
columns
master page elements
character styles
paragraph styles
object styles
Note: Depending on your layout and the overall design of the zine, these may be more critical for some projects than others. Nevertheless, we'll cover these in class, so you're prepared.
Once you have the document set up, start putting in all the pieces. If you're missing a photo, or haven't written a section of copy, put in a placeholder image or some "Lorem Ipsum" until you get it. Be prepared to have to adjust your layout somewhat when you get the real thing-placeholder text always fits, but real text is funky!
Keep going until you get all the pieces in there, and then start making your adjustments. Once all the pieces are in, export it as a pdf, and drop it in my drop box.
Name this file "draft_astudent1.pdf" Do not name it "draft1_astudent.pdf".
You will get homework/lesson credit for preparing your first draft, and submitting a pdf.
Part Six: Second Draft
We will critique the pdfs submitted. Each student will take notes about things that need improved. Students will rework their projects and submit the improved design as a pdf.
You will get homework/lesson credit for preparing your second draft, and submitting a pdf.
Name this file "draft_astudent2.pdf" Do not name it "draft2_astudent.pdf".
Part Seven: Proof
You may need to improve the zine several times before you feel confident that you have made a truly fine product. When you are certain that there is nothing more that you can do to make your zine better, have Rick Thomas in the print shop at rio print ONE COPY.
Email Rick your pdf. Ask him to print the pdf as a booklet, double sided, on "regular" paper. Allow a couple of days for the print to be finished. Often, Rick prints these in a couple of hours, but sometimes he's not in, or he's busy with big projects, and you'll have to wait. The printer in our lab will do it, too, but it's easier to get Rick to do it.
Remember, just print ONE COPY.
Bring your one copy to class. We will critique it.
You will get homework/lesson credit for bringing your proof to class on time.
Part Eight: Print the Edition
After the critique of the printed zine, you may find that you would like to use a different paper, or bind it differently. You may also find some errors that need corrected, typos, misaligned elements, etc. Whatever you decide needs fixed, fix it. Then export a new pdf, and send it to Rick to print ONE COPY, on the new paper, etc.
Examine this copy closely, and when you are absolutely satisfied, have Rick print the edition (all the identical copies-enough for everyone in the class and one for the school).
What you need to turn in:
Your edition of printed zines.
Your final version of the zine, named "zine_astudent.pdf".
You will get homework/lesson credit for bringing your completed edition to class on time.
What I will be grading:
Technical Outcomes: Zine is professionally printed and bound in correct order. Margins, folds and placement are all correct and appropriate. There are no errors in punctuation, spelling, or grammar. Page numbers and other repeating elements are correctly placed. Images are clearly reproduced. Binding is clean and neat. All other technical aspects of a printed zine are professional. Edition is consistent.
Formal Outcomes: The formal style of the zine is consistent with the content. There is a consistent style used throughout, without being overly repetitive. Layout is consistent and creative. Typography is well-considered, using a variety of complementary styles and weights, and reflects content appropriately. Graphics have been adjusted to reproduce well as laser-prints/photocopies.
Conceptual Outcomes: Content is well-developed and appropriate for intended audience.